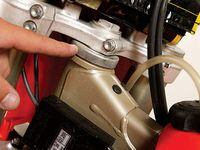
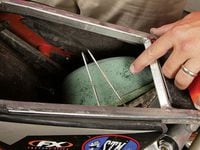
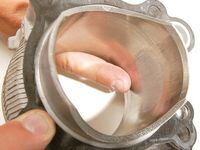
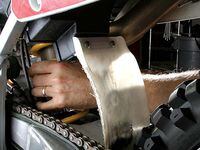
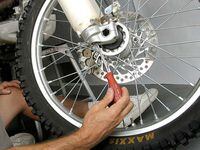
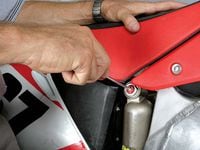
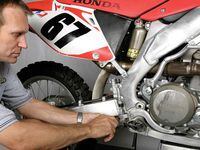
A new bike is exciting, but before you fill up the tank and get it dirty, you need to spend some quality time with your steed. No matter if it just rolled off the showroom floor or out of someone's garage, your course of action will be amazingly similar. You need to go over the bike and make some basic adjustments to dial in the machine to match your weight and riding level and the terrain you will likely encounter.Once again we let FMF's Dave Dye show us around a bike—must be his decade of experience in prepping bikes for race abuse. His last stint as a factory mechanic was wrenching for Chad Reed during 2002 and 2003. Now he gets to deal with us press types—we're not sure he got the good end of that deal.Hopefully, your new purchase will have been treated with more love than a typical magazine test bike. Even if you know the maintenance history of your new ride, you should give it the works as Dye is demonstrating here. New or used, this initial checkup and setup is not rocket science and can be handled by even a novice mechanic. The hardest step is probably forcing yourself to hold off riding it before giving it a thorough inspection.1. It might be a case of "buyer beware," but all bikes, new and used, come in various states of prep. One of the usual problem areas is the steering head. Another is the shock linkage—on everything other than a KTM. Check both. This step requires some disassembly, but the cost later is worth the time now to make sure the bearings in both are adequately greased.2. Oil the air filter! FMF's Dave Dye adamantly insisted you need to oil the filter. No whining; just clean it, let it dry and make sure it's completely coated in the sticky filter oil to trap the harmful soil.3. For those requiring a visual emphasis, this is a severely scored cylinder wall, minus the seized piston—caused by an unoiled air filter.
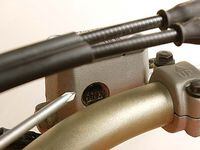
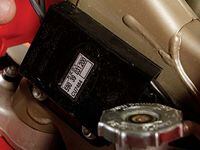
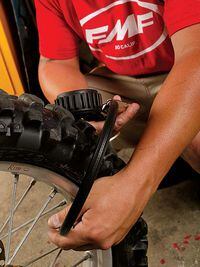
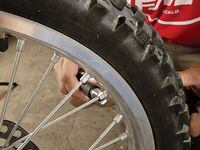
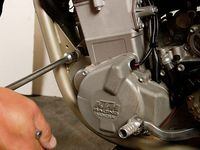
4. Check the action of the throttle cables and adjust and lubricate as needed. The action should be smooth and spring closed easily; any stiction should be investigated. It could be improper routing, fraying (especially on four-strokes) or dirt in the housing. Simply replace the frayed cables. Motion Pro is a good source of replacement cables and housings of all varieties. Using a cable-lube attachment enables you to squirt the spray down the casing to push out dirt and debris and coat the cable with the slippery stuff. Do the same for clutch cables. Ditto for the odometer—if a mechanical unit is installed. Disconnect the throttle cables from the carb before you lube them. Don't force dirt into the carb on two-strokes!5. Check the coolant and top off the radiators if the fluid level is lower than the top of the fins. Use motorcycle-specific coolant and/or distilled water (with any impurities, which can lead to corrosion, removed). You want to see green or even a green tint (as in the photo), not murky water or fluid with debris in it. If you spy that, drain and flush the entire cooling system before going a step further.6. A crucial fluid that often does double duty as a coolant and lubricator is the oil. On a four-stroke, you may have to inspect engine and transmission oils. Check your owner's manual to be sure. On a two-stroke, you need worry only about the transmission, as the engine's lubricating oil is in the gas as premix.There are three basic methods to checking the oil. First is via a dipstick, usually seen only on bikes that hold oil in the frame—do this one after the engine has been warmed up. You want the oil between the high and low marks. Second is done by removing a bolt in the case with the bike held vertically. If the oil is at the proper level, it will just seep out. Fill just until it appears and refasten the screw. The last and easiest is a sight glass, shown here. Hold the bike upright and look at the oil level; on most bikes the minimum is halfway, but again, thumb through your owner's manual to find out the exact amount for your model.7. Replenish the oil as needed. Fresh oil is light gold; used or ready-to-be-replaced is black. When you drain the old stuff, look for metal shavings and any discoloration—a milky substance is coolant in the oil, indicating a leak in the cooling system. Some shavings are normal during the break-in process, but large chunks or a continued presence (after the initial couple of oil changes) are harbingers of excessive wear.8. Hydraulic systems work by using fluid as a flexible lever; push at one end and the fluid pushes an actuator at the other end. The key to making this possible is a sufficient amount of pure fluid in the lines, so you need to make sure both front and rear brakes and the hydraulic clutch, if you have one, have the required levels of clean, specified fluid.The good news is the front brake reservoir has a sight glass that allows you to check the level and condition of the fluid without removing the cover. If the fluid is below the MIN level, add enough to bring the level to the manufacturer's recommendation. If it is murky or discolored, a complete flush and replenishment of the brake system is required—in other words, bleeding. The rear is similar in function, though many modern rear reservoirs require removal of the cap to check the fluid level.9. If your bike is sporting a nice hydraulic clutch, such as this Magura, you'll need to remove the lid to make sure the fluid is at the correct level. On all of these hydraulic systems, keep the look-and-refill time brief to prevent moisture buildup and thus keep fluid deterioration to a minimum.10. On a standard motocross bike, the electrical system is simple: an ignition box, spark plug wiring, a kill switch and not much more. Compare that with an enduro or a dual-sport with so many electrical components you now have a wiring harness on your hands. Regardless of the electrical complexity, you still want to give it a check to make sure none of it is binding or in a position to have the shield rubbed off and expose bare wiring. It's a good idea to apply dielectric grease to all the connections to help prevent moisture from invading and wreaking havoc with the current.11. Check your chain tension: too loose or too tight can lead to premature component wear or detrimentally affect the suspension handling. KTMs require a bit more slack than other models, with four fingers as the standard rule of thumb. While you're there, put some lubrication on that chain. Using an O-ring-specific lube helps prevent those rubber rings from cracking, besides enabling the chain to rotate easier.12. Finish off the bike prep by setting tire pressures. This can wait until you arrive at your riding area, since air pressure changes with temperature and altitude. The average is 12 to 14 psi, with a few pounds more recommended for severe rock conditions.13. With a brand-new bike, an improper break-in can lead to expensive problems later. The spokes are often overlooked, yet they are constantly loosening or tightening as they seat during the initial rides and just under the normal pounding the wheels take. Spend some time checking them.14. After your initial outings, check all the fasteners, which are vibrating loose—especially engine mounting and frame bolts, plus the valves (four-stroke) as they seat. You can make your adjustments to the suspension to get the desired action from it as it overcomes the initial stiction.SuspensionSetting up the fork and shock to work at their best shouldn't require a Ph.D. from MIT. To deconstruct the big mystery of boingers, we asked suspension guru Paul Thede, founder of Race Tech Suspension, to educate the unenlightened in simple, editor- (and reader-!) friendly terms. Thede said that for a new bike, the two most-important aspects are setting race sag and knowing the clicker positions.Static sag, commonly referred to as race sag, is the amount the bike compresses from fully extended with the rider on board. Thede stressed that rear race sag is probably the most-important suspension setting you need to address before hitting the track or trail. He recommended setting both ends, but most dirt guys simply set the preload on the front and worry only about the rear sag. It is important to note there are no magic sag numbers. However, here are some guidelines, courtesy of Race Tech, to use as starting points.
||||||| |---|---|---|---|---|---| Bike Type****Front %****Front (mm)****Rear %****Rear (mm)****Rear Free Sag (mm)|Off-road bikes |22-25 |65-75 |30-33 |95-100 |15-25| |Off-road 80cc minis |22-25 |55-65 |30-33 |75-80 |10-20|
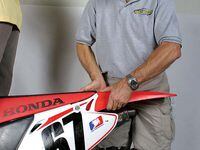
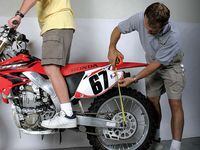
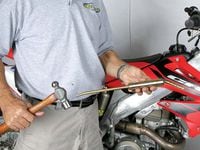
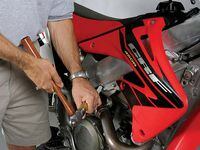
Free sag is how much the bike sags under its own weight. This is measured after you set the race sag. It should be between the numbers listed above. Too little means the spring is too soft, and too much equals a spring that's too stiff. This may be contrary to what you've been told, but trust us, Thede has the graphs and charts to explain why this is so.The Race Tech web site, www.racetech.com, not only is a good resource for suspension questions but has a tool that allows you to enter in your bike, your weight and the type of riding you do and get a Race Tech-recommended spring rate. If your free sag numbers determine you need a softer or stiffer spring, this service can help you find the proper spring rate.When it comes to fussing with clicker settings, Thede recommends either sticking to the stock settings at first or, at a minimum, knowing where they are in regard to the manufacturer's established baseline. These may not be the best for you, but they give you a spot to work from as you get your fork and shock dialed to your taste. To find the stock settings, refer to the owner's manual, the shop manual or even some manufacturers' web sites.So how do you find out where your clickers are set? No need for embarrassment for not knowing, Thede says this is one of the most-common questions he hears. To establish how many clicks out a compression or rebound is set at, listen to the clicks of the adjuster as you turn it clockwise all the way in until it lightly seats. The key word here is lightly. This spot is zero. The adjusters are just like a standard screw; right (clockwise) tightens or turns it, and left (counterclockwise) loosens or backs it out. So to match a particular component to the stock settings, start with it at zero and back it out the desired number of clicks.1. Although this has directions for determining both the front and rear race sag, for simplicity Race Tech's Paul Thede is just demonstrating setting the rear sag. First, extend the fork or shock completely and measure from the wiper to the bottom of the triple clamp on a fork or from the axle to a vertical reference point on the chassis. This is L1.2. Take the bike off the stand and put the rider on board in riding position. Get an assistant to balance the bike or have the rider hold onto something; compress the suspension about 25mm (1 inch) and let it extend very slowly (slowly is the critical term). Where it stops, measure the distance between the wiper and the bottom of the triple clamp or the axle and the reference point on the chassis again. Do not bounce. This is L2.3. Next, lift up on the suspension and let it drop very slowly. Where it stops, measure again. Do not bounce. This is L3. L2 and L3 are different due to stiction or drag in the seals and bushings.4. Halfway between L1 and L2 is where your bike would come to rest with no friction in the seals or the linkage. Therefore, you average L2 and L3 and subtract that from L1 to calculate the true static sag. The formula reads: Static Sag = L1 - (L3 + L2)/2.5. To adjust the preload/sag on the shock, all you need is a hammer and punch—better yet is this handy tool sold by Race Tech that allows you to get around the corners and doesn't mark up the locking rings.6. Loosen the locking rings ...7. ... and turn the spring by hand to raise or lower the rear of the bike then tighten the locking ring and measure again.8. Clicker setting check: Up front you have the compression on top (Thede's company makes another cool tool for accessing the adjuster in the limited space under the handlebar) for twin-chamber-type forks, and on the bottom for other brands and types ...9. ... and rebound on the bottom, as on the CRF450R here or Showa twin-chamber forks from 1995 to present and some 2005 Kayaba/KYB forks.10. Most modern shocks have high- and low-speed compression adjusters that can be set with a screwdriver on the inner and T-handle socket on the outer.11. Rebound is on the bottom.


/cloudfront-us-east-1.images.arcpublishing.com/octane/J2RUDOXTOZHBXOFCUQKBAGBMAQ.jpg)
/cloudfront-us-east-1.images.arcpublishing.com/octane/UDQASRGJ3ZDG3BANXWU6P5NIQY.jpg)
/cloudfront-us-east-1.images.arcpublishing.com/octane/YIICVWCT7FDURLJQ2H4AIMXLOY.jpg)
/cloudfront-us-east-1.images.arcpublishing.com/octane/SKYGGQY3XJCPDAM4CUHUXBS444.jpg)
/cloudfront-us-east-1.images.arcpublishing.com/octane/AONOEIBHJBGMBOCD5HBWVB3UAI.jpg)
/cloudfront-us-east-1.images.arcpublishing.com/octane/76O4I66VBNBS5GXX4DNHXXKHR4.jpg)
/cloudfront-us-east-1.images.arcpublishing.com/octane/3LSXOLSH3NEJDBMO3JZ6CYMK5M.jpg)
/cloudfront-us-east-1.images.arcpublishing.com/octane/QNIQ2A4UEBGNRKB4STEBJPMUX4.jpg)
/cloudfront-us-east-1.images.arcpublishing.com/octane/35SLCX4NQ5AFTHU6EY7FJSNGEY.jpg)
/cloudfront-us-east-1.images.arcpublishing.com/octane/LVH6MQASTRA2RJ74WY2PM7OAFI.jpg)
/cloudfront-us-east-1.images.arcpublishing.com/octane/TDBZ2JZJ7ZBNBLMB677WNPFLJE.jpg)
/cloudfront-us-east-1.images.arcpublishing.com/octane/3JLESTQC3RFDNBJBXT4OMYU65Q.jpg)
/cloudfront-us-east-1.images.arcpublishing.com/octane/4OOTARNHZRFEJJ5ZPVQMG3H6FE.jpg)
/cloudfront-us-east-1.images.arcpublishing.com/octane/MF32EN5WZNAEXCNYDYFNKMC2AE.jpg)
/cloudfront-us-east-1.images.arcpublishing.com/octane/UGLO3U37HJHGLM22F3D4XOWNVE.jpg)
/cloudfront-us-east-1.images.arcpublishing.com/octane/WSK35AT3LBBH7GZSXAXXREGF6U.jpg)
/cloudfront-us-east-1.images.arcpublishing.com/octane/OXEZZUYKDJHFVB4K7AIQSLRR7M.jpg)
/cloudfront-us-east-1.images.arcpublishing.com/octane/RVOG445TMRAZBNJ77OV3TN5QGQ.jpg)
/cloudfront-us-east-1.images.arcpublishing.com/octane/IQNDTQPP4BE3HE5JUWJ36ONAUU.jpg)
/cloudfront-us-east-1.images.arcpublishing.com/octane/Z6YUC3S26FF4TOKFTXZ7I746YY.jpg)
/cloudfront-us-east-1.images.arcpublishing.com/octane/UOWIK3H4BJHP7F4ONETCB7IXDQ.jpg)
/cloudfront-us-east-1.images.arcpublishing.com/octane/6KKT5NNL2JAVBOXMZYS5ZO76YA.jpg)
/cloudfront-us-east-1.images.arcpublishing.com/octane/PCDJQEHF35A4LCOEW2WGBIAD64.jpg)