How To Change A Dirt Bike Tire

Tip on how to properly change your tire

Brian FleckDirt Rider

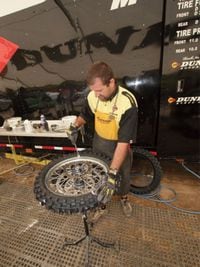
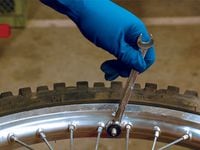
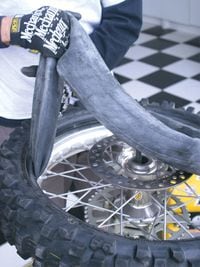
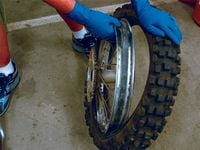
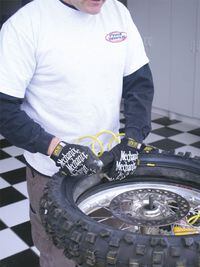
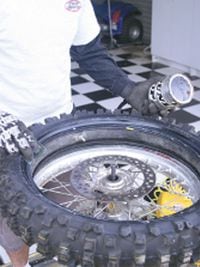
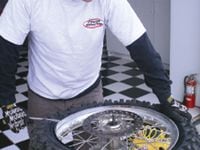
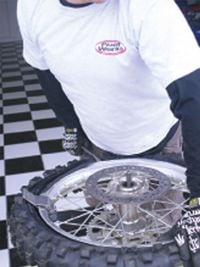
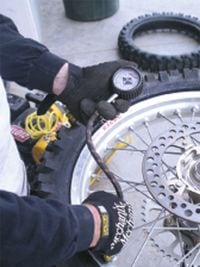
Most riders and racers love having that great traction you get with a new tire but hate changing it. Jay Clark at Dunlop assures us that if you follow his steps, use the proper tools and take your time, you will become the envy of your riding buddies, changing tires with minimal effort and without bloody knuckles. Clark let us know there are many effective ways to change tires; he has found that the professional Dunlop motocross staff have developed an especially efficient method. There is no reason to get worn out before you're even on the bike! The key point of this technique is that you don't try to work a tube into the tire and rim after you have one side of the tire already on. Start with the tube in the tire and with enough air to keep the tube round.

Be sure to have the proper tools.Dirt Rider

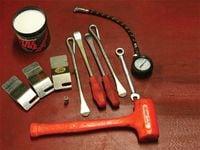
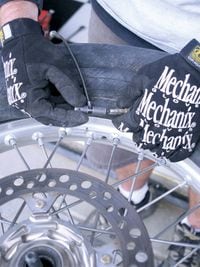
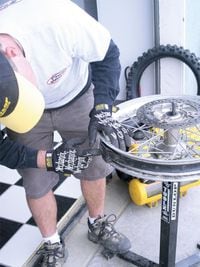
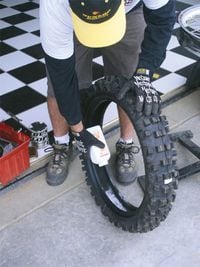
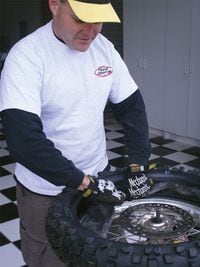
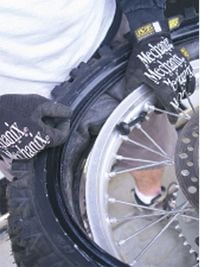
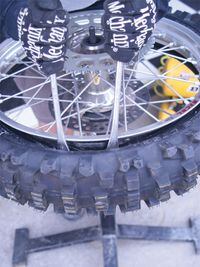
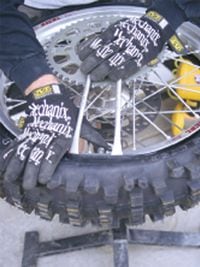
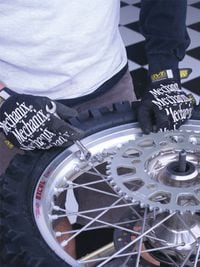
Tools of the trade: A dead-blow hammer, valve stem remover, talc-based baby powder, 12mm wrench or socket (13mm for Euro bikes), tire spoons (two are mandatory, but three are nice to have), Bead Buddy from Motion Pro, tire paste, pressure gauge and, hopefully, a good tire stand. Of course, you don\'t have to have a stand; having one just makes the job a lot easier. Wearing good work gloves will also help your grip and reduce those dreaded bloody knuckles.

Start with the sprocket side of the wheel up. Remove the valve core completely to make sure all air is out of the tube. If you don\'t have a tire stand, use a pad like a square of carpet or a double-folded towel to protect the disc and sprocket from the ground.Dirt Rider
Loosen the rim lock nut(s) and back it off until just a couple of threads hold it on. Note whether the nut feels bound on the threads in any fashion. If so, some corrosion may be forming. Use grease or anti-seize on the threads before you tighten up the rim lock.Dirt Rider
With the sprocket side up, use a tire spoon to break the bead of the used tire from the edge of the rim. Have the bend in the iron down, slide it under the edge of the rim and use the shape of the iron and the additional leverage available to force the bead down. Work all the way around the rim in this manner.Dirt Rider
Flip the wheel to the disc side and break the second bead all the way around the tire. Push on the tire to ensure the bead is completely broken, then push the nut on the top of the lock bolt to force the rim lock into the well of the tire. That will allow you to break the bead loose at the rim lock. The lock may be jammed in place, and a flat tire iron across the top can help work the rim lock down.Dirt Rider
While you hold the tire bead down off the inner shoulder of the rim with one hand, slide your spoon-style tire iron in and lever a section of the tire edge up and out of the rim. Push the iron under the disc to hold it while you work in the other two levers.Dirt Rider
Continue to slowly work your way around the tire, moving the next tire iron the shortest possible distance from the last one-usually about 2 inches apart from each other. Any closer and you will have too much trouble pushing the tire iron in between the tire and the rim. If you have the luxury of three tire levers (I like the Motion Pro spoons), it makes the job easier. You don\'t have to fight and pull out irons as much.Dirt Rider
Once one side of the tire is all the way off, pull the valve out of the rim and then pull the tube out of the tire (if you have average strength, it won\'t be hard).Dirt Rider
I reinstall the valve core as soon as I remove the tube to ensure it is ready for reinstallation. Plus, I won't lose it.Dirt Rider
Flip the wheel to the sprocket side and start dismounting the other side of the tire. You want to end up with the tire on the outside of the rim.Dirt Rider
Pick the wheel up off the stand and hold it with the rim lock on top. Bump the bottom of the tire/wheel combo on the ground, and the rim should drop deeply into the well of the tire.Dirt Rider
The used tire will now easily push off of the rim. I have a sturdy stand, so I just push the tire off the bottom edge of the rim and let the tire fall around the stand. This technique won\'t work if you are using a bucket or something similar for a stand.Dirt Rider
Another method (shown here) is to set the wheel on the ground, hold the tire with one hand and push on the rim with the other hand.Dirt Rider
Inspect the rubber rim band and the rim lock to ensure no debris or sharp edges are marked into the rim and the threaded ends of spokes do not show above the spoke nipples. Any of these may lead to a tube failure. Some riders discard the rubber rim strip, but most tire technicians prefer to leave it in place and make sure it is in good condition. If you simply must have tape, try to use a special plumbing tape that resembles wide, heavy-duty electrical tape. It is made of plastic and doesn\'t have a cloth weave that can fray like duct tape does.Dirt Rider
Drop a bit of talc-based baby powder in the new tire to keep the tire and tube from chafing against each other and wearing out the tube. The powder will also allow the tube to slide as it inflates, and this slipperiness will minimize pinch flats while you air up the tire the first time. Upon the recommendation of pediatricians, many baby powder brands have switched from talc (a powdered, slippery mineral dust) to corn starch. Corn starch just makes a mess and doesn\'t help. It isn\'t slippery enough. Look for a brand that lists talc as the main ingredient.Dirt Rider
Have the rim on the stand with the disc side up. Insert the tube into the tire. Get it in as straight and smooth as possible, with no twists or folds.Dirt Rider
Add a small amount of air (very small) into the tube to allow it to assume its round shape.Dirt Rider
Apply tire paste with a sponge or use a 50/50 mix of dish soap and water. Don\'t use chemicals, as they can stay slippery and cause the tire to spin once on the bike. (That\'s what Clark says. Some DR staffers use WD-40 and similar penetrating lubes with no problem and claim such products actually stick the tire to the rim. Just keep it away from the brake disc. Others DR editors prefer to do it completely dry so the tire irons don\'t shoot out faster and higher and leave dents in their already ugly heads.)Dirt Rider
Insert the valve stem into the rim with a nut to keep the tube in place. If it is located near the valve core, you also want to have the rim lock in place at this time. If it is 180 degrees off, don\'t worry about it, we\'ll get to it later. Do leave it in the rim with the nut still lightly threaded.Dirt Rider
With the tube in the tire, work the tire on. If you take small bites with the tire spoons, putting on the first side should be relatively easy. You will find that the tube will end up trapped between the tire iron and the bead of the tire and the rim. Move it out of the way if possible, but at least push delicately on it. You should be able to see if you are pinching the tube hard enough to damage it. Don\'t worry about the rim lock not being inside the tire.Dirt Rider
Flip the rim to the sprocket side. The rim lock should be pressed up against the side of the tire. With two spoons, push down the rim lock and work the tire back and forth in a walking motion that lets you ease the tire over the rim lock.Dirt Rider
While holding the tire off the bead, push up the rim lock inside the tire. You must make sure the shoulders of the lock are above the beads of the tire. Let the tire go back into place with the rim lock on the inside of the tire. Make sure the tube is above the rim lock.Dirt Rider
Flip the wheel and tire back to the disc side and apply tire paste or soap to this side. Using two tire irons about 4 inches apart, push down and insert your Bead Buddy tool to keep the tire down off the bead. I like to keep this about 2 inches from the valve stem.Dirt Rider
Start maneuvering the tire on with small bites, inserting the tire spoons every couple of inches. Keep one hand pushing down on the tire to keep the beads down and off the shoulders of the rim. When you get to the last 6 to 8 inches, you might need to push and pull on the tire to make sure all of the bead is off the rim shoulder. If it ever gets really hard, you need to set the bead down into the well of the rim. If you do this correctly, the last bite you take will be relatively easy. If it is really hard, you might still need to push the tire down more.Dirt Rider
The last few bites with the tire spoons need to be done correctly and with plenty of lube. Try to lift the tire irons up until they are parallel with the top edges of the rim and no farther. That will prevent tube pinches. Some riders who prefer a bar-type tire lever grind a notch across the tip of the tire iron between 5 and 10mm back from the tip. The notch will catch on the rim and prevent the iron from slipping in too deeply. The key is to keep the bead pushed down off the rim shoulder so it will not be too hard to finish these last few sections.Dirt Rider
Remove your Bead Buddy with a slight pry on the tire.Dirt Rider
Set your tire pressure between 12-14 psi. Rocky, ledgy conditions (for off-road or moto), hot weather or a heavy rider are all reasons to consider using a few more psi than the standard.Dirt Rider
Install the valve cap so it stops against the valve stem nut. Don\'t tighten the nut down to the rim as that can cause the stem to rip out of the tube if the tire slips on the rim.Dirt Rider
Tighten the rim lock nut; however, be careful not to overtighten it as you can damage the rim or pull the bolt right out of the rim lock. Now go ride!Dirt Rider