There aren't too many people on this planet who have laid down more dirt bike decals than Bart Hayes of Powersport Grafx (RidePG.com). And with that distinction comes experience. And with experience comes knowledge... well, okay, let's just stick with experience.
We asked Mr. Hayes to give us a primer on installing graphics (grafx?) and making them stay put. Bart was clear to make the distinction between installing graphics on new plastic and installing graphics on old plastic. And regardless of your method for putting the decal in place, Bart maintains that the most important step is making sure the plastic is ABSOLUTELY CLEAN.
According to Bart, with old plastic, the thing to remember is that you absolutely have to remove all of the old glue from the plastic after you have removed the old decal. With new plastic, it's imperative that you remove all of the plasticizer, or mold release, from the surface where the decal will go down.
You won't get any kind of decal to stay in place if your not starting with a clean surface."First, when installing graphics on old plastic you want to remove the old decal and then you need to clean the plastic really well," advises Hayes. "Use a good brake cleaner to clean off any old glue, dirt, squirrels, dog hair, or anything that might be adhering to the plastic. We use Motorex brake cleaner.""New plastic is the toughest. You almost want the plastic to look dull after you've cleaned it. Alcohol will not work; soap will not work. You have to use something that's a solvent, only a good brake cleaner or solvent," insists Hayes.
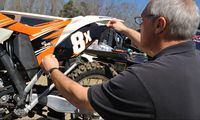
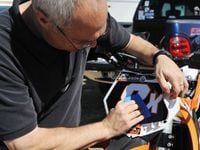
As far as installing the dirt bike decals, Hayes says, "Once the plastic is clean, you need to line up the ends of the decal, start across the center and place it down. Then you want to squeegee from the center outward to get all the bubbles out. It you happen to get a bubble you just pierce it with an x-acto knife and squeegee out the air. It's as simple as that!"


/cloudfront-us-east-1.images.arcpublishing.com/octane/WM3CKNM255E7NLISG3J5SOU63Y.jpg)
/cloudfront-us-east-1.images.arcpublishing.com/octane/XP5WDDR2AVGR3BF5S6TPCGYJ5A.jpg)
/cloudfront-us-east-1.images.arcpublishing.com/octane/7UAIG5GYLZH7LD72MKUYIHQYWU.jpg)
/cloudfront-us-east-1.images.arcpublishing.com/octane/6KXNSCIBK5BUNIJXUUELRO5W5Q.jpg)
/cloudfront-us-east-1.images.arcpublishing.com/octane/ZEQ7DSS7ZJCSLDAPECTSOAOGXI.jpg)
/cloudfront-us-east-1.images.arcpublishing.com/octane/OFSXJJ5PZFEZ5D5ZPMCFVHJUMA.jpg)
/cloudfront-us-east-1.images.arcpublishing.com/octane/N2JLNLG44VEKBMEPORRDTMX5A4.jpg)
/cloudfront-us-east-1.images.arcpublishing.com/octane/EOERU244ONEWVKQ7C24OHMRVWY.jpg)
/cloudfront-us-east-1.images.arcpublishing.com/octane/JF4T3ULTGNHTVEKSTNKLJ2IGKY.jpg)

/cloudfront-us-east-1.images.arcpublishing.com/octane/FAOZEEEXFVA3ZK2PYMY3DHI2EQ.jpg)
/cloudfront-us-east-1.images.arcpublishing.com/octane/WCAUGYKA5FDZTB64FM36LJFMMM.jpg)
/cloudfront-us-east-1.images.arcpublishing.com/octane/EIDVOIN5IJDMRIVS2VNTOOBVSA.jpg)
/cloudfront-us-east-1.images.arcpublishing.com/octane/5BSWCTPONFB3DJFRPJ34STZMR4.jpg)
/cloudfront-us-east-1.images.arcpublishing.com/octane/KSERUHQUTNHLBCWKXS2R3TYZHI.jpg)
/cloudfront-us-east-1.images.arcpublishing.com/octane/GGOH2AQRSVHY5C5JLNEVYLB5SU.jpg)
/cloudfront-us-east-1.images.arcpublishing.com/octane/TJJEHV3ATZFFXHUYZABHXKE2DI.jpg)
/cloudfront-us-east-1.images.arcpublishing.com/octane/M7L5LNQ5JZENHNBTCHEIKZKD24.jpg)
/cloudfront-us-east-1.images.arcpublishing.com/octane/WIC4RXQ36BAXNIW6U4UJ3XDLKI.jpg)
/cloudfront-us-east-1.images.arcpublishing.com/octane/G64JLSXQBJFMVPTETPM4H353EU.jpg)
/cloudfront-us-east-1.images.arcpublishing.com/octane/ZBMLCCOSNJBIVAEC2OU6YSONKY.jpg)
/cloudfront-us-east-1.images.arcpublishing.com/octane/U7PDRXGEI5DCFJGSVGNLAHGIMA.jpg)
/cloudfront-us-east-1.images.arcpublishing.com/octane/S553MV5QAJFOHGOKYO7TJ6NGYA.jpg)
/cloudfront-us-east-1.images.arcpublishing.com/octane/62WLA7IMLVF2LIPTA4DGILHZIM.jpg)